Thursday, August 19, 2010

My very first collection!

I was silence in my blog for a while it is because I was sick for such a long time. These couple of days I feel better and wake up from the bed with a lot of ideas....happy!

For the past few months, I have been working on my collection of bags and accessories. They are sweet and beautiful....let´s enjoy them here together!


1. Sweet Pink Shoulder Bag


2. Red Bow Bracelet


3. Colorful Cosmetic Pouch


4. Blue Handbag


5. Set of Cosmetic Pouch


6. Vintage Shoulder Bag


7. Blue Belt


8. Sweet and Sour Denim Belt


There will be more sweet things from me. Thanks everyone!
Have a good day ^_^

Wednesday, July 28, 2010

In my sweet memory

More than 1 year ago, on 6 March 2009 was my wedding in Thailand. My husband and I met in Japan in 2005 and we keep our relationship for 4 years before getting married. And here we are!


I made my own wedding dress, anyone believe in this? And yes it is true. I spend around 6 months to make the dress and all made by hand! I was so happy to design and try to put many kinds of materials, beads on the dress and it came out nice. I was satisfied with it.


I brought the dress to use in the wedding in Chile also. Here are more pictures of the dress.


I love and happy to make it. Hope some of you like it also ^_^
Have a good day!

Monday, July 26, 2010

Cute inspiration

I have found a picture of a cute bag that I took it for my inspiration for my new bag. This is what inspire me....


It looks so cute, right? .....so I tried my best to make my bag as cute as this one and now it is ready right here.....


It is not exactly the same but I love it....^_^ Is there anyone else love it also?

Thursday, July 15, 2010

Blue handbag

Today I have another how to for the blue handbag.


Let´s start here!


Finish....enjoy your bag ^_^

Monday, July 12, 2010

It´s tea time!

Few days back a made a small basket to put the tea on the table. It adds color on the our dining table and the tea looks more inviting to drink.


Let´s enjoy the tea with my homemade birthday cake...


Wednesday, July 7, 2010

Pink Flower Cosmetic bag

My one fine day started with making this cute pink flower for cosmetic bag. This bag is made for my mother-in-law. She gave me the fabric in her collection to do this project. I selected the pink and brown tone. One side is decorated with red bow and another is with wind mill patchwork.


And here I have some pictures of how to for this bag, in case someone feel interest.


Our wind mill...


Finish!!!


Tuesday, July 6, 2010

Colorful and vintage!

Some days back I was creating one of the bag from my dot printed fabric and another one from the beautiful fabric decorate with vintage lace.


The colorful one is made fancier by white beads. It took me one and a half days just embellish with the beads, however, it came out pretty!


The vintage one is also adorable!

Thursday, June 24, 2010

Small All-Purpose Bag

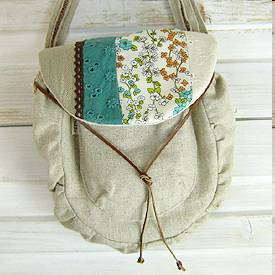
I am taking a class of patchwork and quilting with Thai teacher online. It is fun and joyful. I found my teacher on Thai web blog. She is so nice and generous. The bag we are making can carry our wallet and mobile phone. Let´s learn together with me here.

Step 1, start with making the pattern.

- Cut the paper with the size of 18 x 30 cm. and another one is 9 x 9.5 cm.


Step 2, Cut the fabrics.

- Select the fabric of your choice, but it is better cotton because this work we will quilt by hands!
- Cut the fabrics for outside part with 2 cm larger than the pattern.
- Cut the fabrics for lining with 1 cm larger than the outside fabric.
- Cut the polyester with the same size of the lining fabrics.


Step 3, Quiting

- Let´s quilt as you like


Step 4, Lockstitch

- Cut the work to the same size of the pattern.
- And let´s stitch the edges as shown in the picture.


Step 6, Make a small fabric inside our bag

- Cut the fabric with the size of 14x20 cm
- Fold half in the length
- Sticth it and attach in the inner part of our bag


Step 7, Assemble the bag
- Find the middle point
- Pin both of the side part with the middle point
- Stitch all together
- Lockstitch


Step 8, Put the zipper and finish!


It´s ready to use now...enjoy!